
With this much of the hull "finished" I continued work on the skeg and keel. This is tricky because the exact line that the keel fits to is not visible until the planking is finished and then planed back to a flat 75mm wide for the keel to sit on. That said, I had enough hull to prepare the landing for the skeg. The next photo shows the skeg balanced on the hull (which still comes to a point in the centre) as I try to convince myself that it will all work out right in the end. There's a string line down the centre of the boat and the stick poking out of the pilot hole in the skeg is on the line of the stern tube.

Here's the skeg sitting on the hull on the flat the I have planed from the stern as far forward as the 3rd layer of planking. I have added another lamination to the skeg; I hope that when all the planking is done the keel will sit on the skeg and follow the correct line along the hull.

I have glued the skeg in place with some 316 SS coach screws to add to the strength of the joint. I have great faith in epoxy but needed some screws to hold the skeg in place until the glue set so used some substantial screws.
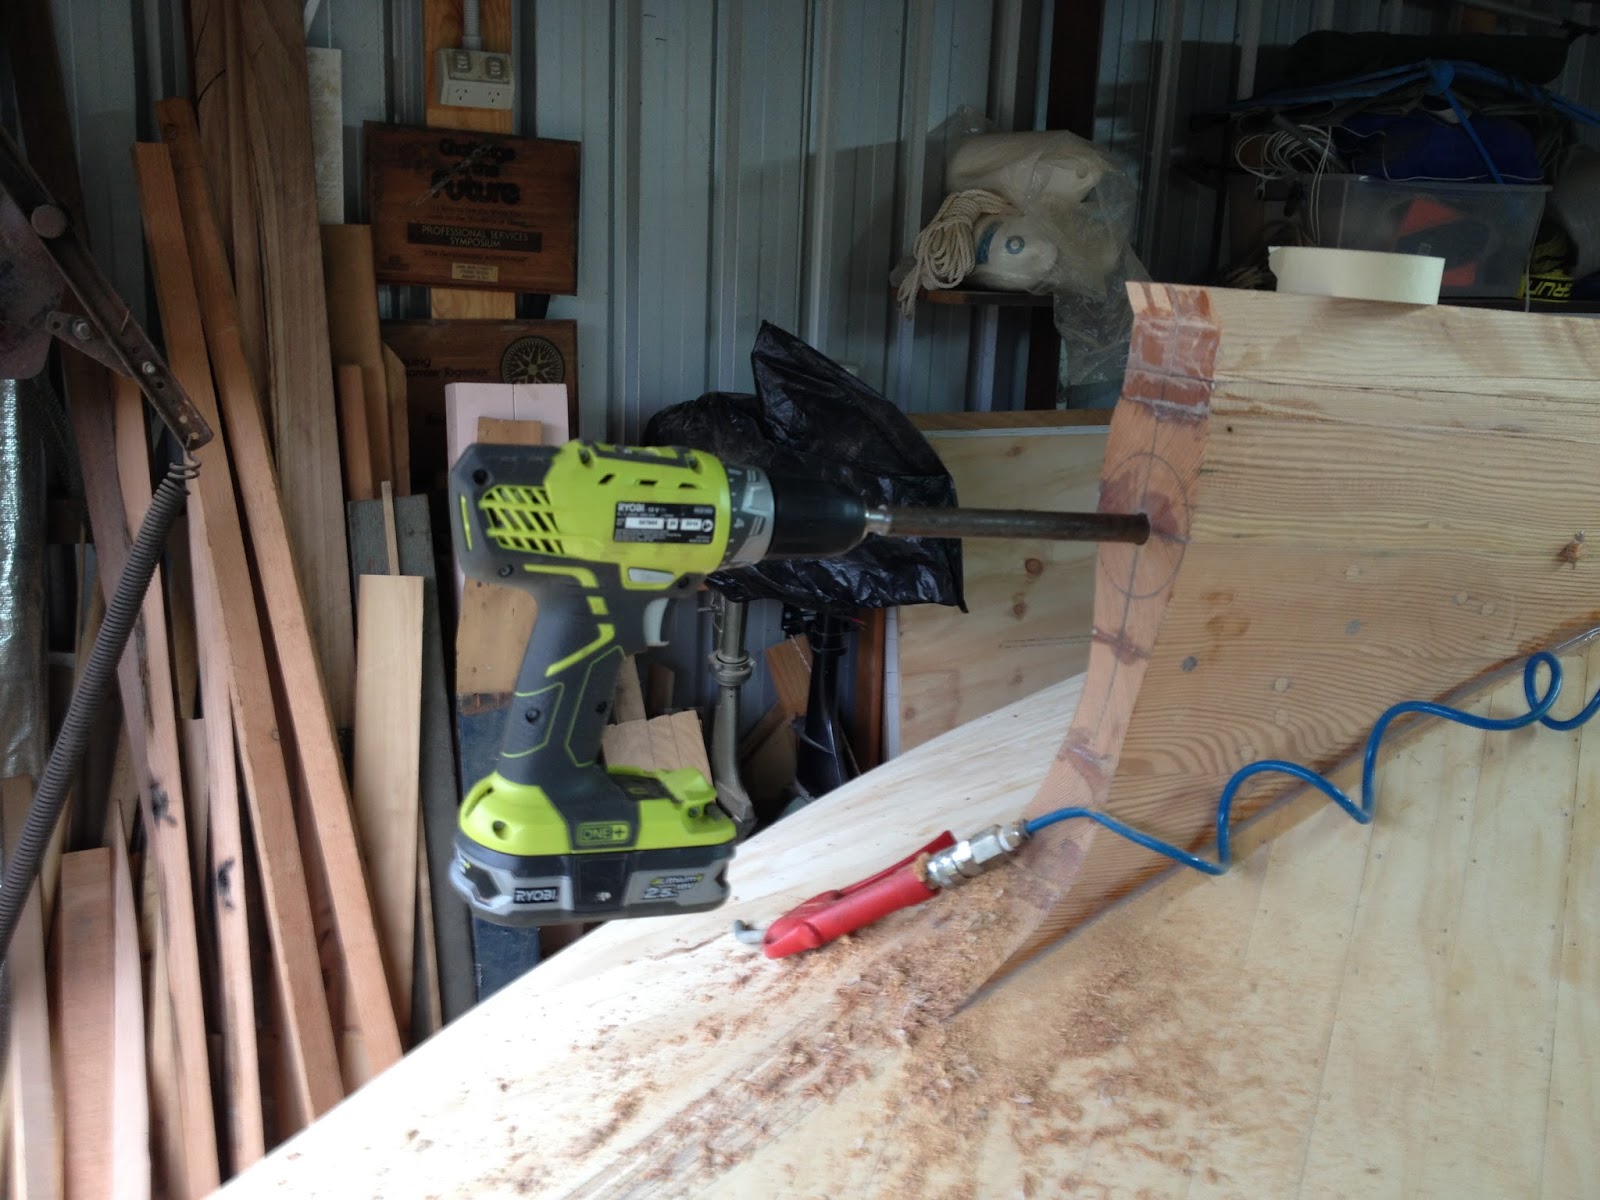
With that done I set about drilling the hole through the hull using the pilot hole in the skeg. I made up a drill extender from a piece of 16mm steel rod; turned one end down to 12mm to fit in the drill chuck and bored the other out to 1/2" for the big twist drills. The drill is held into the extension with Loctite. I started with an 11/16" drill bit to get some clearance for the extension. It looks like a test to destruction for a battery drill but it did the job without any drama (as the drills get bigger I may have to find a more powerful drill).

That's it, all done. I had to keep pulling the drill out to clear the chips and the air gun helped with that.
Now that I can see where the hole comes out on the inside of the boat ( about 2 or 3 mm off the centre line) I will make up and fit a block to support the inboard end of the stern tube. When this block is glued in place I will extend this initial hole through it and then set about making the hole bigger. I will do this with twist drills up to 1" and then rig up a boring bar exactly on the centre line to take the hole out to suit the 1.75" diameter stern tube.
No comments:
Post a Comment